
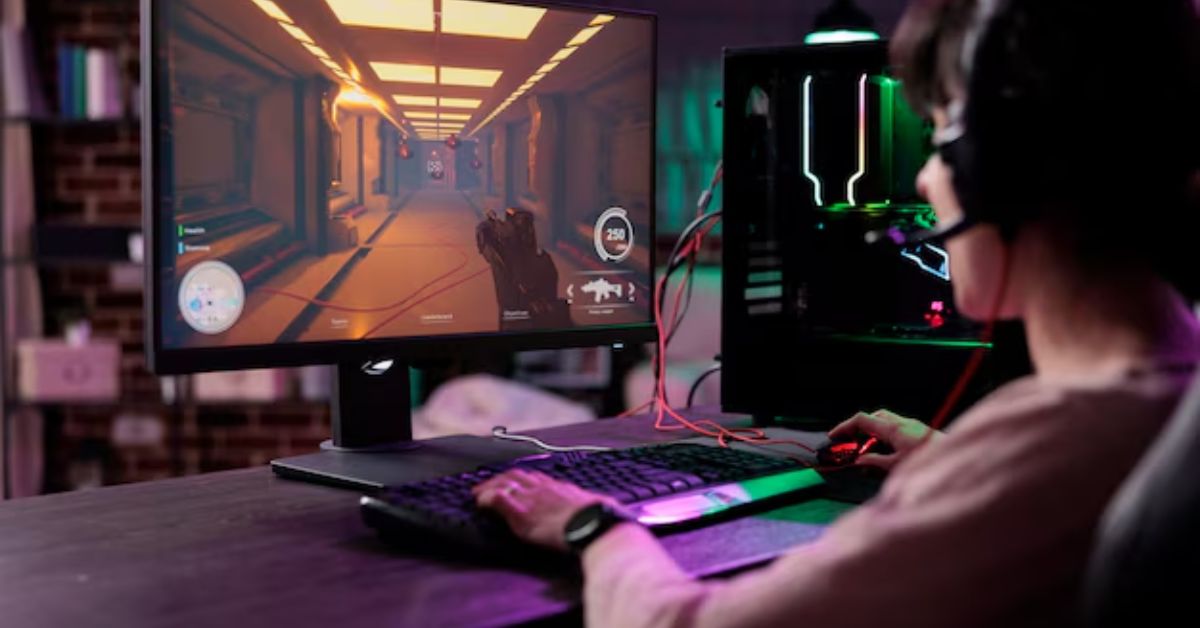
In the world of gaming, performance is everything. A gaming PC provides the power and flexibility necessary to handle today’s demanding games. Whether you’re an enthusiast looking for high-end performance or a casual gamer seeking smooth gameplay, building a gaming PC can enhance your overall experience.
This article will explore the key components, essential considerations, and tips for creating the ultimate gaming rig. From choosing the right graphics card to selecting an efficient cooling system, we’ll guide you through the process of building a gaming PC.
Why Build a Gaming PC?
1. Customizability and Performance
Building a gaming PC offers customizability that is hard to match with pre-built systems. You can select components tailored to your specific needs, ensuring maximum performance. From overclocking the CPU to fine-tuning the graphics, you have full control over every aspect of your machine.
A custom-built PC also allows for future upgrades, ensuring your system stays relevant for years.
2. Superior Graphics and Processing Power
One of the main reasons gamers opt for PCs is superior graphics and processing power. Unlike consoles, a gaming PC can deliver ultra-high-definition graphics, better frame rates, and faster load times. With the right components, your PC can handle the most demanding AAA titles without breaking a sweat.
The ability to achieve higher resolutions and frame rates provides a more immersive gaming experience.
3. Versatility Beyond Gaming
A gaming PC isn’t limited to gaming alone. It can be used for tasks like video editing, graphic design, and even programming. The powerful components that enhance gaming performance also improve productivity in other areas. A well-built gaming PC can easily multitask, making it a versatile addition to your setup.
Having a system that can handle both work and play increases its overall value.
Essential Components of a Gaming PC
4. Central Processing Unit (CPU)
The CPU is the brain of your gaming PC and plays a crucial role in its overall performance. A powerful CPU ensures that your system can run demanding games smoothly while handling multitasking. Popular choices include Intel’s Core series and AMD’s Ryzen processors.
For gaming, a quad-core or higher CPU provides the necessary power for modern games.
5. Graphics Processing Unit (GPU)
The GPU, or graphics card, is the most important component of any gaming PC. It handles the rendering of images, animations, and videos, directly affecting game performance. High-end GPUs from brands like NVIDIA and AMD are essential for running modern games at high settings.
Choosing a GPU with a higher VRAM capacity ensures better performance in graphically intensive games.
6. Motherboard
The motherboard connects all your components, acting as the backbone of your gaming PC. It determines what kind of CPU, RAM, and storage you can use. When selecting a motherboard, ensure compatibility with the CPU and GPU to avoid bottlenecks.
For gamers, motherboards with multiple PCIe slots provide room for future expansion.
7. Random Access Memory (RAM)
RAM plays a crucial role in gaming performance by storing temporary data that games need to run smoothly. Most modern games require at least 8GB of RAM, but 16GB or more is recommended for optimal performance. Faster RAM speeds also contribute to quicker load times and smoother gameplay.
Choose DDR4 RAM with a higher frequency for better performance in memory-intensive games.
8. Storage: SSD vs. HDD
Storage is another essential factor when building a gaming PC. Solid-state drives (SSDs) offer faster read/write speeds compared to traditional hard drives (HDDs). An SSD significantly reduces load times and improves overall system responsiveness. However, HDDs provide more storage space for a lower cost.
Many gamers opt for a combination of SSD and HDD to balance speed and capacity.
9. Power Supply Unit (PSU)
The power supply unit is responsible for delivering power to all your PC components. It’s important to choose a PSU with enough wattage to support your system’s power requirements. A high-quality PSU ensures stable performance and prevents potential damage to your components.
Modular PSUs offer the advantage of cable management, keeping your build clean and organized.
10. Cooling System
Gaming PCs generate significant heat, especially during intensive gaming sessions. Efficient cooling is crucial for maintaining performance and prolonging the lifespan of your components. Air cooling systems, with fans and heatsinks, are the most common. However, liquid cooling offers superior heat dissipation for high-end builds.
Choose a cooling system that fits your budget and gaming needs.
Choosing the Right Gaming PC Case
11. Size and Aesthetics
The case of your gaming PC plays both a functional and aesthetic role. You’ll need to choose a case that accommodates your components and provides proper ventilation. Gaming PC cases come in various sizes, from full towers to compact mid-towers. The size of your case will depend on the size of your motherboard and GPU.
Additionally, cases with tempered glass panels and RGB lighting add a visually striking element to your setup.
12. Cable Management Features
A cluttered PC case can affect airflow, leading to overheating. Look for cases that offer good cable management features, such as hidden compartments or Velcro straps. Proper cable management not only keeps your PC looking clean but also improves cooling efficiency.
Investing in a case with easy cable routing options makes the building process much smoother.
13. Future Upgrade Potential
When selecting a case, consider the potential for future upgrades. Choose a case that has enough room for additional storage, extra fans, or even a larger GPU. Planning for future upgrades ensures that your system remains up-to-date without the need for a complete overhaul.
Modular cases make it easier to swap components as your needs change.
Building Your Gaming PC: Step-by-Step Guide
14. Step 1: Install the CPU
Begin by installing the CPU onto the motherboard. Align the CPU with the socket and carefully lower it into place. Make sure to apply the thermal paste and attach the cooling fan securely.
Handle the CPU with care to avoid bending any pins.
15. Step 2: Mount the Motherboard
Next, mount the motherboard inside the case, ensuring that it aligns with the standoff screws. Secure it in place using the screws provided with your case. Ensure all ports and connectors are accessible for easy connection.
Double-check that the motherboard is firmly secured to avoid any future issues.
16. Step 3: Install RAM and GPU
Install the RAM into the designated slots on the motherboard. Ensure they click into place securely. For the GPU, insert it into the PCIe slot on the motherboard and screw it into the case to hold it in place.
Make sure the RAM and GPU are firmly connected to avoid any performance issues.
17. Step 4: Add Storage and PSU
Install your SSD or HDD into the drive bays and connect them to the motherboard using SATA cables. Next, install the PSU at the bottom or top of the case, depending on the design, and connect it to the motherboard, GPU, and storage.
Ensure all power connections are tight for stable performance.
18. Step 5: Connect Cables and Power Up
Connect all necessary cables, including the front panel connectors for the power button, USB ports, and audio jacks. Attach the fans to the motherboard or power supply, ensuring they have enough power to run efficiently.
Double-check your connections before powering up your system for the first time.
19. Step 6: Install Operating System
Once your build is complete, install your chosen operating system. Most gamers prefer Windows for its compatibility with gaming platforms like Steam. Follow the installation instructions and set up your PC for gaming.
After the installation, you can download necessary drivers and begin personalizing your setup.
Maintaining Your Gaming PC
20. Regular Cleaning
Regular cleaning helps maintain your gaming PC’s performance and longevity. Dust can accumulate over time, blocking airflow and causing components to overheat. Use compressed air to clean fans, filters, and other components regularly.
A clean PC is a more efficient PC, ensuring your system runs smoothly.
21. Updating Drivers and Software
Keeping your drivers and software up-to-date is essential for maximizing gaming performance. Regularly check for updates on your GPU drivers, as these often provide performance enhancements for the latest games.
Updated drivers also help prevent compatibility issues with newer games and hardware.
22. Monitoring Temperature and Performance
Overheating can reduce your gaming PC’s performance and shorten its lifespan. Use monitoring software to track temperatures, especially during intense gaming sessions. If your system runs too hot, consider adding more cooling or adjusting fan speeds.
Keeping temperatures in check ensures a longer lifespan for your components.
Conclusion
Building a gaming PC offers unmatched performance, customization, and versatility. From selecting high-end components to maintaining your system, the process of building your own gaming rig is rewarding. By following this guide, you’ll be well on your way to creating a gaming PC tailored to your specific needs and preferences.
FAQs
1. What’s the most important component for gaming performance?
The graphics card (GPU) is the most crucial component, as it directly impacts graphics and game performance.
2. How much RAM is needed for gaming?
At least 8GB of RAM is required, but 16GB or more is recommended for modern games and multitasking.
3. Why should I choose an SSD over an HDD?
SSDs offer faster load times and better system responsiveness compared to traditional hard drives (HDDs).
4. How often should I clean my gaming PC?
You should clean your gaming PC at least every few months to prevent dust buildup and overheating.